Sunday 1st May 2016
Let’s start with the backpack itself.
When you go for a long travel adventure during which your backpack will literally be your house, it is super important to spend some time choosing the right backpack for you.
The anecdote goes that originally I had bought this 60+15L Lowe Alpine Wilderness backpack.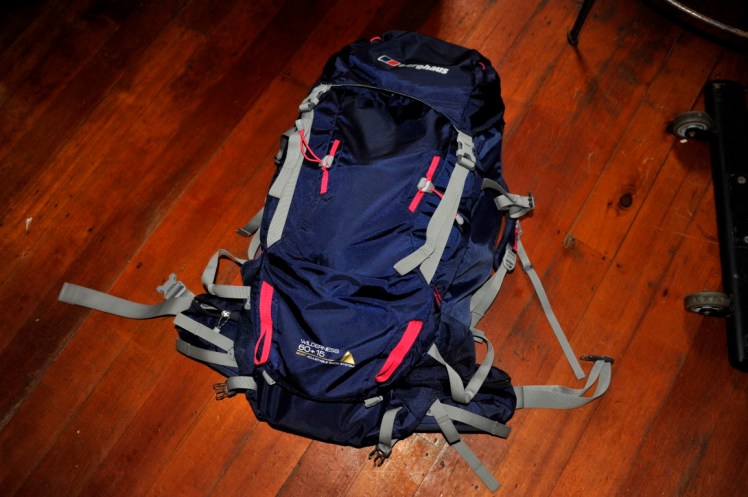
I did a test run hiking and bushcamping with it for three days in Girraween National Park near Brisbane with about 22 kilos in it to see how I would go with the pack full of all the stuff I wanted to take with me and I got bruises at the hips and on the collarbones. I realised the support at these key weight points was not that great.
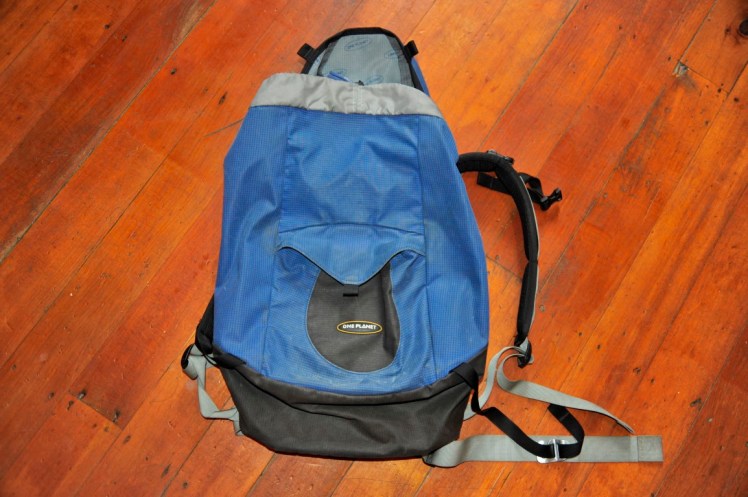
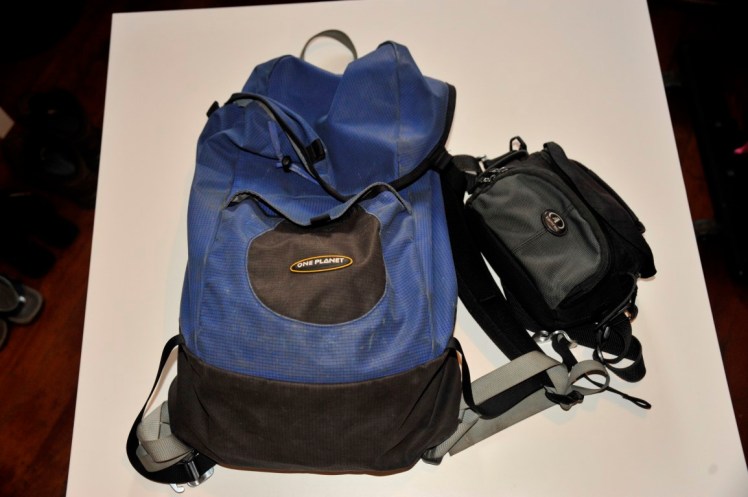
But mostly, I realised I could not fit in everything I wanted to take with me! During the test run, I was carrying in front of me a small backpack while hiking. Which is a definite no-no! It doesn’t work. So literally three days before to take off for South America, I went to K2 Basecamp hiking store in Brisbane and said: That backpack I bought from Mountain Designs is too small. Please can you give me a 90L pack??? The guy said: “For your height (1m70), a 90L backpack would be damaging your back. You need to stick to 60-75L max. Here is a 70L pack which in reality has lots of space inside. Try it out.” And that’s how I got to discover and buy this One Planet big backpack, Made In Australia.
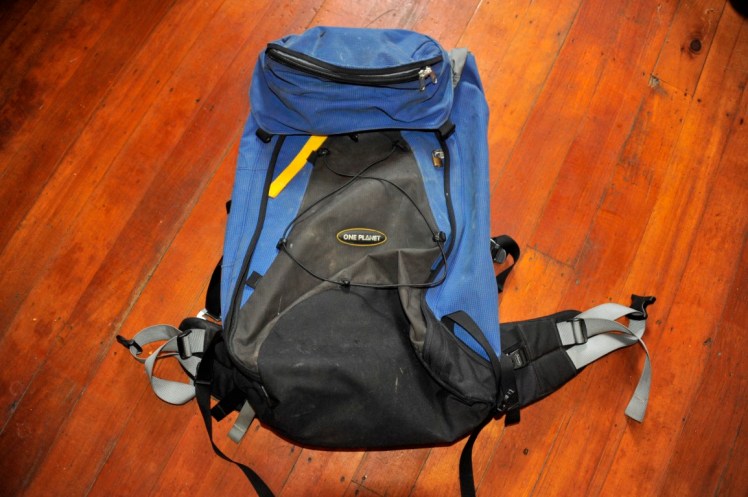
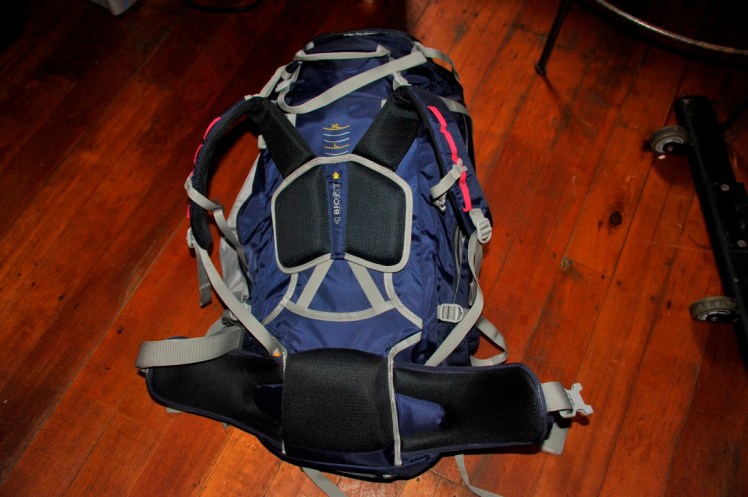
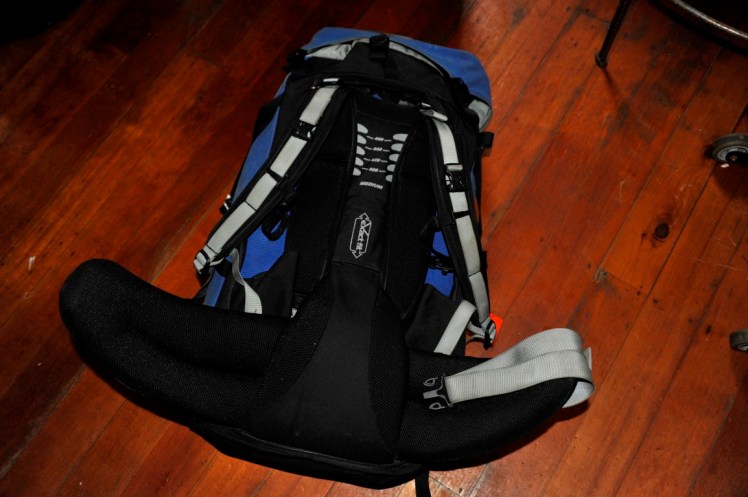
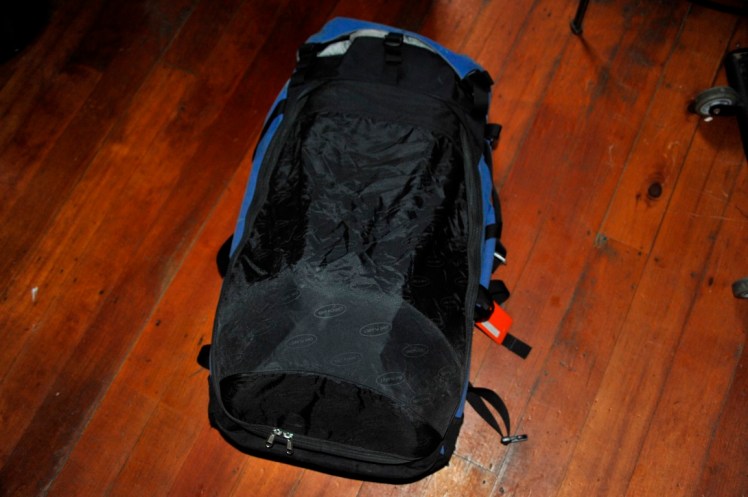
The support I got from it during the entire trip on the hips and collarbones was great. You can see how the hips straps are way thicker and more solid than the Lowe Alpine one. I had some great features also like this massive big pocket on top of the backpack and also the two mini-pockets left and right above the hips straps which proved very handy during hiking to put in a 500ML Nalgene bottle, snacks, gloves, headware, sunglasses and so on.
It has also something really handy, a cover for the straps. This was useful when taking planes but also when putting the bakpack into dirty buses as it was protecting the straps from dirt and damage.
K2 Basecamp was also selling a small 25L backpack which goes with it and can clip on the big backpack so I got that one too and this became the setup for the trip even if I actually never really used the clicking function.
What I liked with both backpacks was the sturdiness. They are made of canvas which lasts for years and years. The downside was that the material was more heavy so the big backpack itself was about 2.8 kilos which would be a no-go for ultralight backpackers.So here were the backpacks I had.
Now the stuff in there.I realised that I had never really taken photos of the full content of what I had in my backpack until now so yesterday I went through it all. A couple of friends have asked me during the trip: What do you have in your backpack? so here we go.
Disclaimer: This list is what worked for me for this particular trip. The content of my backpack for my 8-month trip four years ago that I spent mostly in South-East Asia and where I was not hiking at all was totally different. So that list worked for me this time for this trip but everyone is different and each trip is also different. I hope it can be inspiring and giving ideas for people preparing similar trips but this is just some ideas.
Let’s start with the hiking gears:
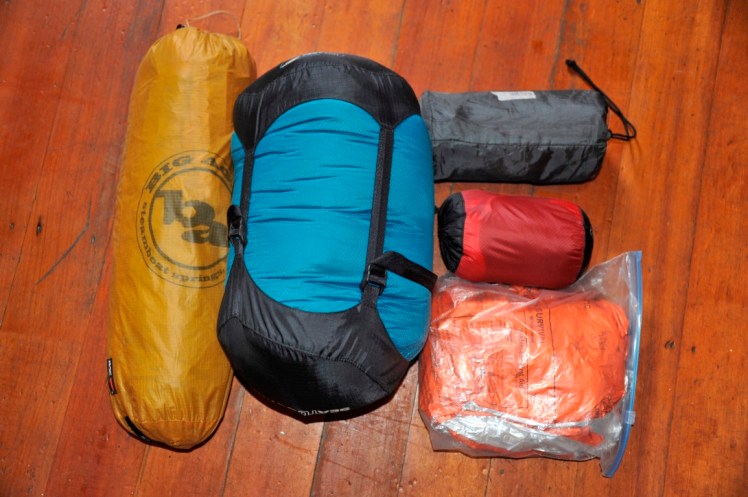
– A “2-people” 1 kilo only Big Agnes FlyCreek tent which in reality fits one person and their big backpack or two people very tightly with backpacks outside the tent. I love this tent! Light to carry and compact, easy to setup but very resistant to rain and wind. Big Agnes is an American brand reputed for their high quality tents. If you need a tent, another tent maker I have heard a lot about is the Swiss Hilleberg which makes the best tents in the world apparently, but they are not always cheap.
– A -10 degrees comfort sleeping bag with down feathers from Sea to Summit (Talus 2). If it was to do again, I would have ordered the Talus 3 which is -17 degrees comfort as I got cold some nights but it still worked well. Down feathers are great because they make the sleeping bag really warm but also really light and compact when carrying it.
– An X-Lite Thermarest mattress Normal Size. I had ordered the Woman size but it was too narrow so I sent it back and got the Normal Size which gave a bit more comfort. It was 320 grammes and packing light but cringing a lot which makes it too noisy and annoying. I would want to buy one again that cringes but Thermarest otherwise is a great brand.
– A Thermolite fabric reactor +8 degrees from Sea to Summit which is a liner that adds extra warmth. You slide into it and then into the sleeping bag. They have +5, +8 and +11. If it was to do again, I would have bought the +11degrees.
– A Safety Blanket which came handy in the Torres del Paine Day 7 hike when the place where we pitched the tent was really damp. It can be handy in other occasions and worth carrying.
If you live in Australia, these items or similar ones can be purchased online from this store for example: http://www.wildearth.com.au/
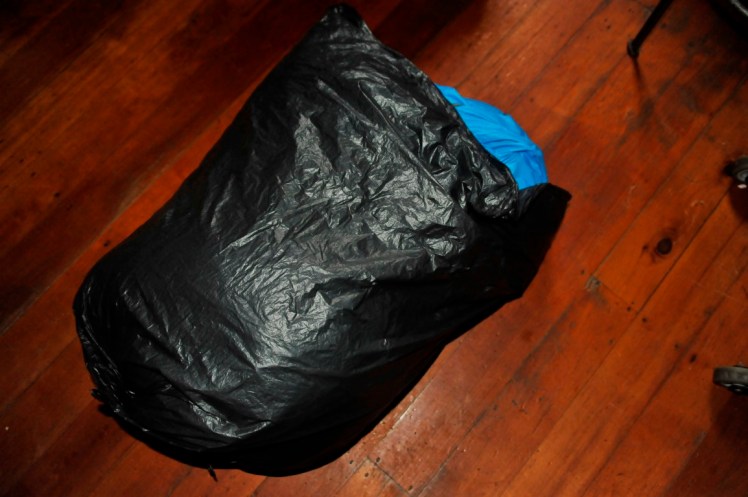
Small tip about the sleeping bag. I was putting it into a bin bag before to put it inside the sleeping bag bag. This ensured that it could not get wet.
Besides that, it was also great to have the massive bin bag because every single time I could, I left the sleeping bag outside of the compression bag, just into the bin bag or on the bed depending of where I was. The feathers inside get damaged otherwise and the sleeping bag will loose its fluffy warm quality.
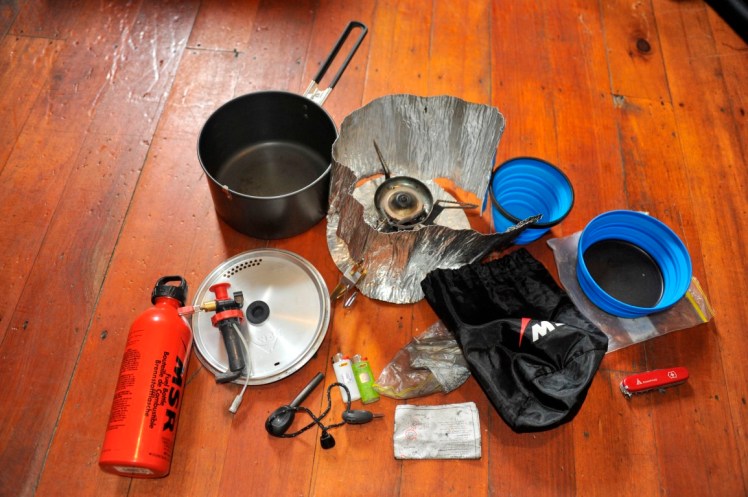
Cooking setup: A 2.5L pot inside which I was fitting the stove, a Swiss Knife, a plate and a cup and also a spork that I gave away on my day getting out of the Torres del Paine.

Here is how it looks. For the little story, I had originally bought the 2.5L MSR pot with another pot and plates and cups but didn’t need all these so gave it back and got the 2.4L MSR pot but then realised the stove didn’t fit in there so went back to the store and gave back the 2.4L pot and got again the full setup as I needed a 100ML extra inside the pot in order for the stove to fit in!
– MSR Whisperlite International Stove. About 350g too. Goes with the MSR bottle. You can get the 345ML bottle, the 600ML bottle and the 900ML bottle.
– Sea to Summit foldable cup and foldable bowl. Very handy that they can be flattened out!
– 2 lighters in case one went empty and also a “Light my fire” Swedish Firesteel which can be handy under rain when everything is wet or if both lighters didn’t work. Fun to use. I could actually have taken with me only that thing and no lighters!
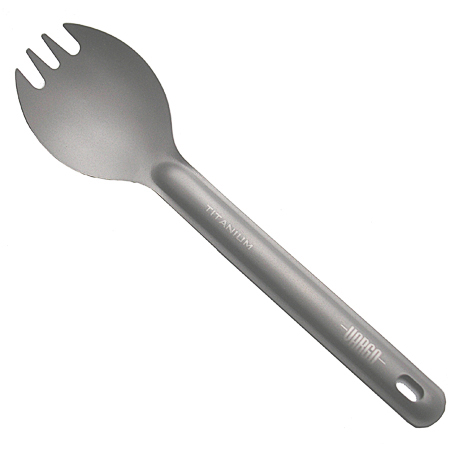
And the spork. A spork (spoon / fork = spork) is very handy for any type of trip you do because that means you can pop up into a supermarket and buy some food for which you need a spoon or fork and indeed..you have a spoon or fork on you! Titanium is great because it lasts forever. Plastic sporks always break in two at some point.
Trekking Poles. I bought these ones from Black Diamond called “Distance Carbon Z” which were a model that had just come out. Superlight foldable carbon poles. 120g each. Carbon is just lighter than aluminium even if more fragile apparently, I had no issues with mine and they were so light that it was really enjoyable to use them. I bought the 110cm one for my size but I would advise going to the store and trying them inside the store to make sure you get the right size and getting advice about what to look for from a good salesperson. For example your arm needs to be horizontal, parallel to the ground when holding the trekking pole. You don’t want the wrist to not be aligned otherwise you could get pain in your wrist / elbow.
Now would I consider this item essential? Absolutely. Trekking poles are NOT just for old people. They are actually for the young people to save the knees NOW while hiking so that later when we are old, we can still hike. It helps to minimise the usage / damage caused to the knees and is super-hyper important when hiking with 10 kilos or more on your back or when going up and down on steep ascents and descents, especially descents. They are not that necessary for flat normal walks just carrying a bottle of water. Many many hikers find excuses to not use them like “I don’t need them”, or “I want to have my hands free.” or “I don’t see the difference.” Often, they haven’t really tried them…Now, it’s back to personal choice anyway. Do you care about your knees? No? Then don’t buy them. At the end, it’s your body. You have the right to not want to take care of it. 🙂
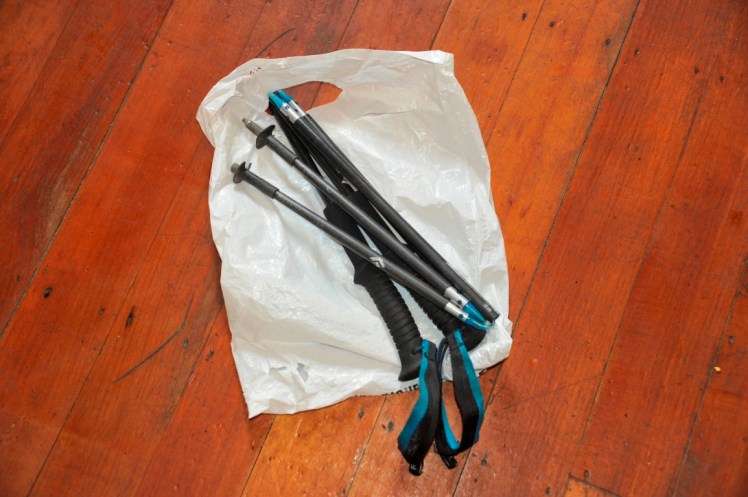
How they look when put together. I need to repair the ending of one of them that came off.

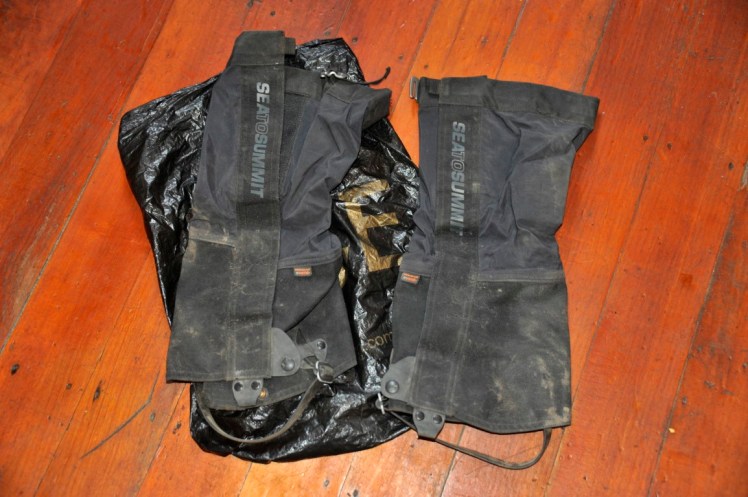
Gaiters. Got them from Sea to Summit. A workmate from my previous job, Gerhard, told me before to leave: Make sure you take with you one luxury item. Something that you don’t really need but appreciate a lot. That luxury item would be the gaiters for me. I could definitely have done without during this trip to South America but I just liked them. Now gaiters in Australia come really handy when going bushwalking because of the snakes as they protect the legs until the knee. Most snake bits occur below the knee. But for South America, they came handy when I went horse-riding in El Cocuy and in Mendoza and when there was a bit of snow to go through in Torres del Paine but otherwise I could have travelled without that extra-weight. Depends where you go. If there is going to be snow or leeches, you may want to take them with you.
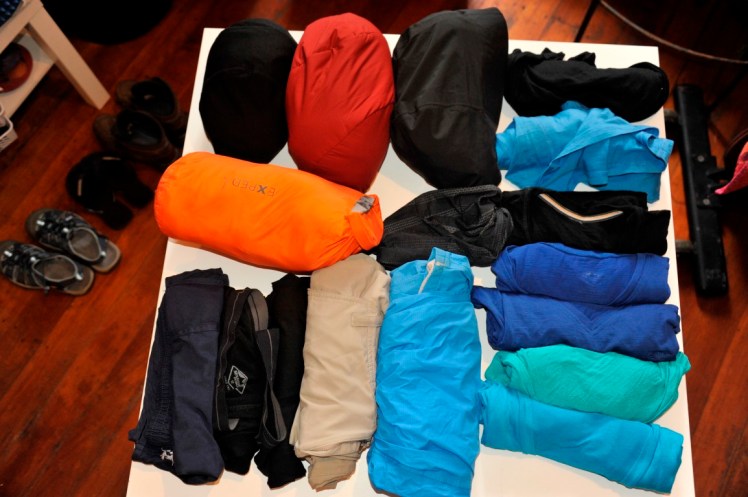
That’s it for the specific hiking stuff. Now shoes and clothing.
I had three pair of shoes for the entire 6 months.
– 1 pair of hiking shoes kindly given by my mum when I stopped over the Christmas before to go travelling. However, these were not really waterproof so if it was to do again, I would have invested in a really good pair of hiking shoes that was totally waterproof.
– 1 pair of flip flops. Useful when taking a shower in shared bathrooms and when finishing a long day hike to let your feet breathe a bit and to walk around in hot days. Havaianas is a Brazilian brand created in 1962 of flip-flops that are very comfortable and lasting long. They are very popular in Australia in particular.
– 1 pair of closed water shoes with VIBRAM support. They turned really hand when doing rafting in San Gil in Colombia and in Futaleufu in Chile, but also when doing paragliding or just walking in hot weather, such as the first 3 days in Cartagena, the day in Santa Cruz bolivia, Arica in North Chile, my day in the hot humid Sao Paulo. And for all the occasions where all my socks were dirty and I was still going for a day exploring. As such, they are not “essential” and I would probably not take them when travelling only a few weeks but when travelling for months, it was nice to be able to switch from the hiking shoes to some other good walking shoes that didn’t require socks.

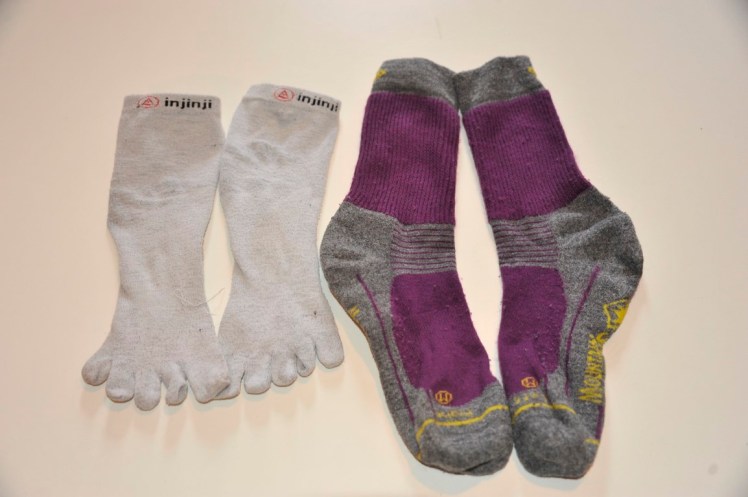
5 Merino underware, 2 Merino sports bras that became my everyday bra (one missing on this picture), one normal bra. 3 pairs of Injinji socks and 4 pairs of warm wool socks. A Merino hat that I didn’t use much ultimately. I could have done without most of the trip. I gave it back to my parents early November but then regretted when hiking Torres del Paine as the weather was snowy but hiking was making me warm. So it could have been good to wear it during walking and keeping the Cusco hat for the evening. It was nice to buy this hat in Cusco itself, I really like my Cusco hat. So if you start with Peru, wait to be there to buy a hat.

When wearing my hiking shoes, I was always wearing two pair of socks. This is a secret to having no blisters that another workmate in my previous job, Simon H., told me about. And it does work. First the Injinji gloves style base liners. And yes, they are very comfortable socks. And second the wool socks. Now the trick is that the injinji need to still sit higher on the calf so that the heat evaporates through them.
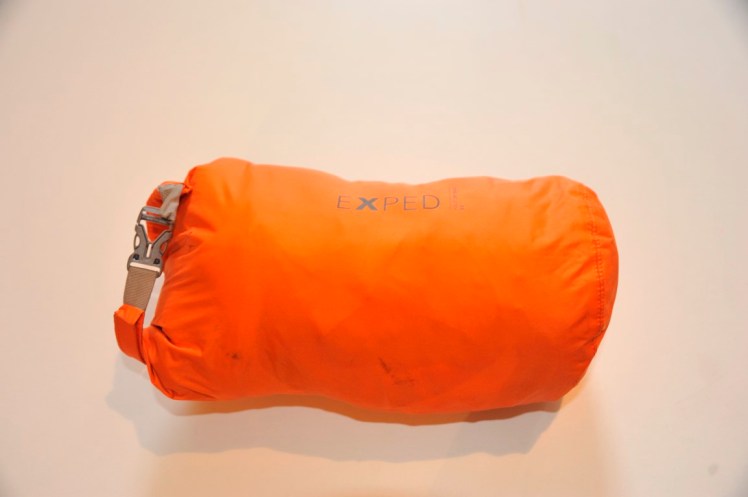
And all of this was fitting in this little Exped bag.
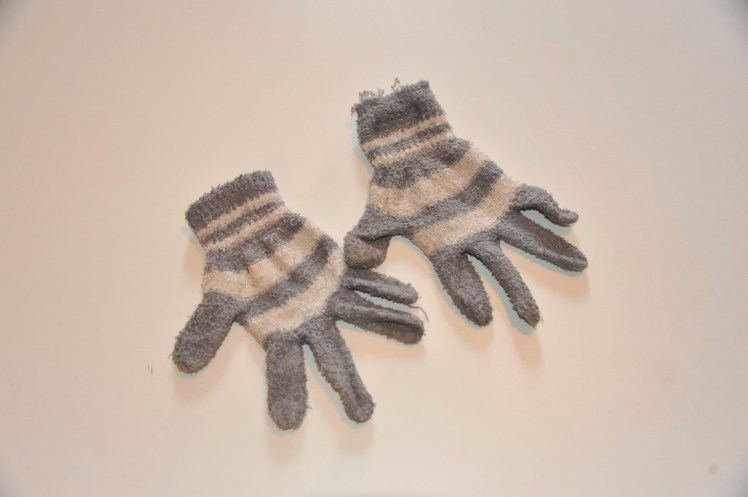
I had this small pair of gloves that was meaningful to me because I bought it in the north of Lao a few years ago. They came handy when my other gloves were wet. The other gloves I had were snow gloves, warm and protecting from the snow. Saying that, they were not that good. Having good gloves fitted for the type of travel / hike you will do is extremely important. Often we forget how important it is to protect our hands correctly. It is worth doing some research and investing in good setup for gloves. I didn’t have the ideal setup yet.
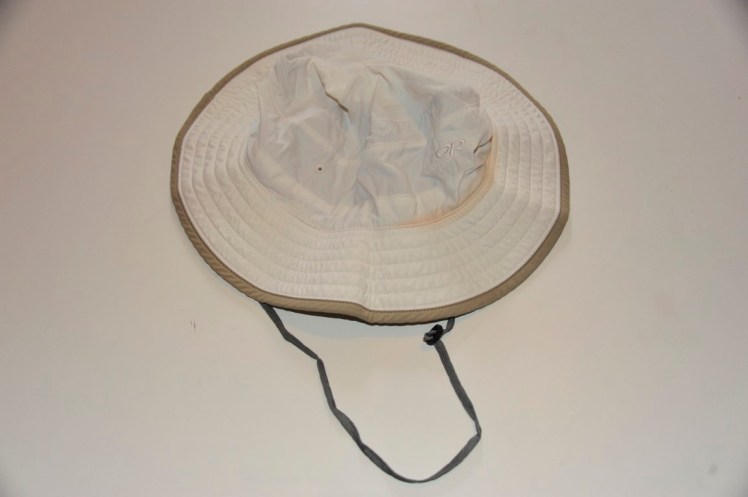
A hat for the heat to protect your head and face from the sun. White is the best because if it is black you will boil. A strap under the neck is great as you never know how windy it will be. A hat to me is nicer than a cap because it protects the neck too. And a light material is better as otherwise it will be too much weight to carry.
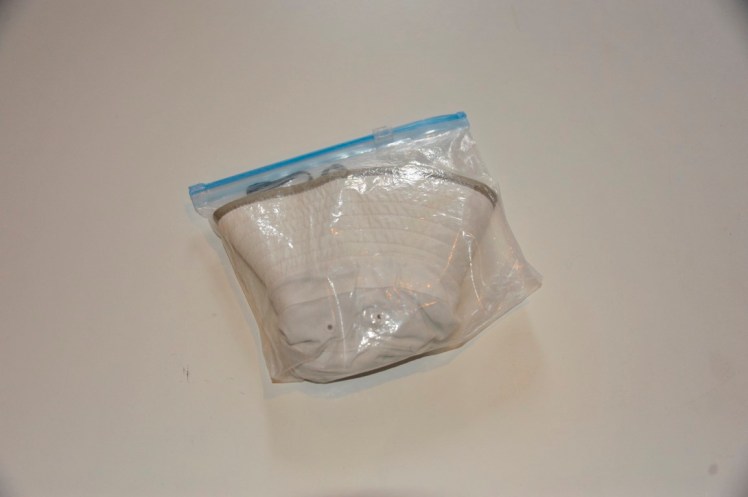
I was keeping it constantly in a separate ziplog back to try to keep it white as long as I could (although it didn’t completely work!)
Here were my pants for 6 months. A swim wear short which proved handy in hot places as much as the rain shoes were. I could probably have got rid of it at some point and picked up one again later but when I arrived in Sao Paulo, I was very happy to have it for the day. It was great also for the hot days where I could wash my hiking pant.
I had a hiking pant which I could transform into a short. This pant was my main pant for the entire trip. It’s worth investing in a good pant of a nice fabric that will be light, wind-proof, sturdy and dry fast. I also had 2 Merino leggings. It was nice to have two for the cold days of hiking where I would be wearing one under my hiking pant, and keep the other one for the night. And finally, I took with me a rain pant which also proved handy on the cold days and rainy days. I found it for 5 dollars in a charity shop. So if you are in a country where there are many charity shops, it is worth going to check there first if people gave away hiking clothes before to invest in some. On cold days, I was wearing the Merino underpant, the hiking pant and the rain pant on top, for example most of the days where I was hiking in El Cocuy National Park end of July in Colombia.
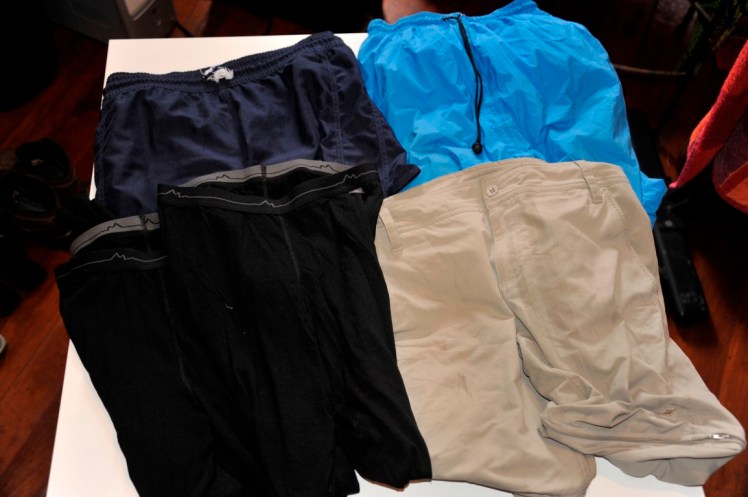
That’s how they look:
")
")
")
")
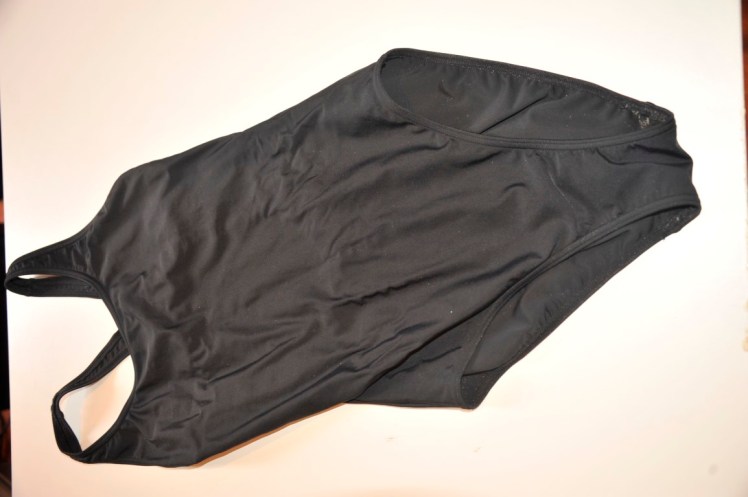
I also had one swimming suit. I am a swimmer / surfer / diver / snorkler rather than a beach bather so when surfing and diving for example, a one piece for a woman can be nicer as the bra arcade and straps can be hurting when lying on a surfboard or having dive bottles behind your back. For the Galapagos, I also bought a bikini on the first day on the island which came handy as we were in the water twice a day snorkeling the first 8 days so it was great to have a dry swimming suit for the second snorkle. It wasn’t that great bikini though so I left it in the hostel room in Lima a few weeks later and only kept my one swimming suit.
For the top, I had 5 Merino shirts for hiking and I bought 2 normal cotton shirts in Cartagena. They proved handy during the 5-day Ciudad Perdida trek where nothing was drying and I was happy each morning to have a dry shirt I could wear, but it was also handy to wear the cotton shirt before going on a long hike and the other cotton shirt on the day back from the hike. When I was putting my hiking pant to wash, I could wear on hot days the Merino legging and the Merino sport bra and the cotton shirt which was a long shirt like a shirt / skirt which was great. During hiking, I usually kept the blue hiking shirt for the day and would change for the second one once the first one had gone dirty and was keeping the black merino shirt for the night. One thing to keep in mind, like for the hat and which also applies to the hiking pant, is that when it is hot and sunny, you don’t want to be wearing black but rather beige, blue, white otherwise you are going to absorb even more heat on your body. This was the first layer.
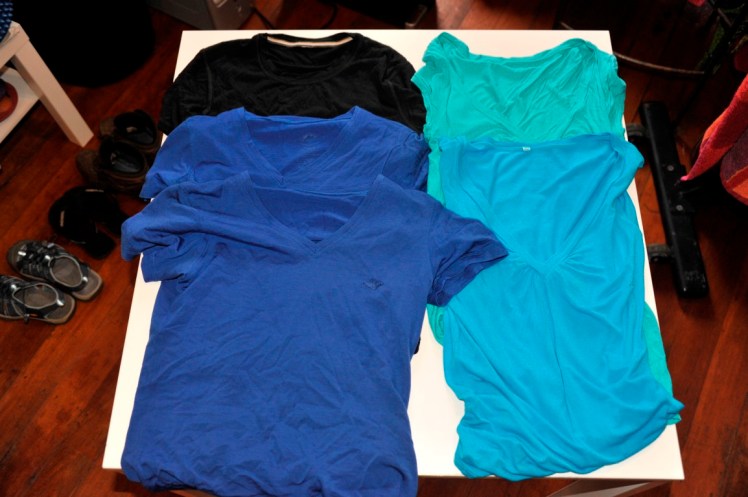
For the second layer, I had 2 Merino long-sleeves shirts. One for the day, the blue one, and one for the night, the black one. They were handy in particular in the evening when it was getting cold and a couple of layers were helping.

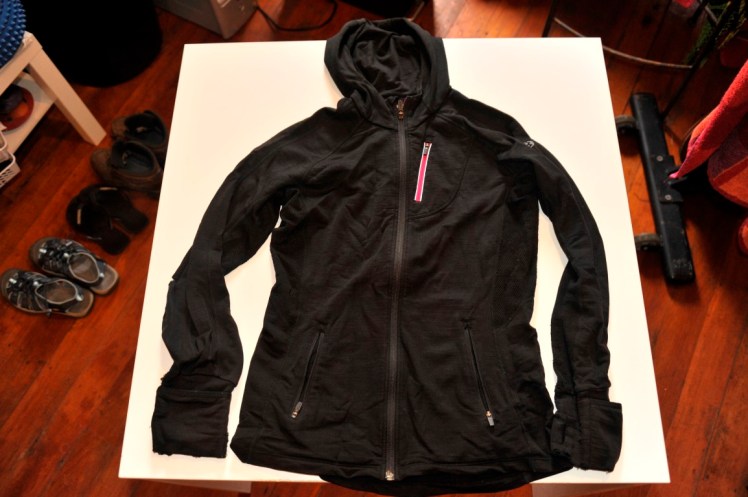
I had one jumper, a wonderful beautiful Merino jumper with hood that I love a lot and was my only jumper for the trip. I was wearing it really often so if it is going to be your one jumper, make sure you take one you really love. The hood was great but also having some zips on the hand pockets. There are very talented thieves in South America, and a zip is an additional protection against them. That was my third layer.
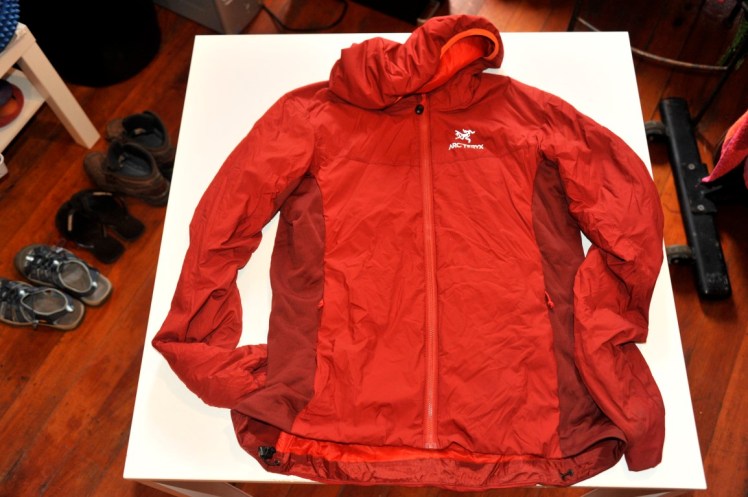
For the fourth layer, I had an Arc’teryx down jacket.Arc’teryx is a Canadian brand which has revolutionised the down jacket by making them lighter but most important jackets that can dry really quickly if they get wet, which often is the issue with down jackets. It is really warm and really comfy and makes an awesome fourth layer. And I loved the colour and the style. One of my prettiest clothing item probably ahah!
Then I had the final item, the fifth layer, the most important of all: the rain jacket! When you get a rain jacket, make sure you get one with a hood which is firm like a kind of cap extension which will protect you well when you get the rain / wind into your face. And the straps on the side of the hood are essential to be able to pull them as much as possible to keep the hood tight. It is important also to invest in a good one that will keep you dry under it, no matter how much rain is pouring on you. I remember that day walking back from a hike to La Cumbre in Minca, and being under a pouring rain for 3 hours, and arriving with my t-shirt dry under the rain jacket, while my shoes on the opposite were completely soaked and giving me the feeling I was walking into a swimming pool shoes. You also want something really breathable inside the jacket so that you don’t sweat too much in there while wearing it. And here we are with the fifth layer.

When hiking, many people describe how important it is to play with layers and be able to add them on and peel like an onion so that you are never too cold or too warm but just good. When hiking, we change gear setup sometimes a dozen of time in the same day depending of the weather conditions so having a good layering system is important. The only time when I needed a sixth layer which was provided to me was in Huayna Potosi, which was an additional warm fleece jacket on top of the Merino fleece and below the down jacket. But that was at 5,300m high. Not an every day thing.
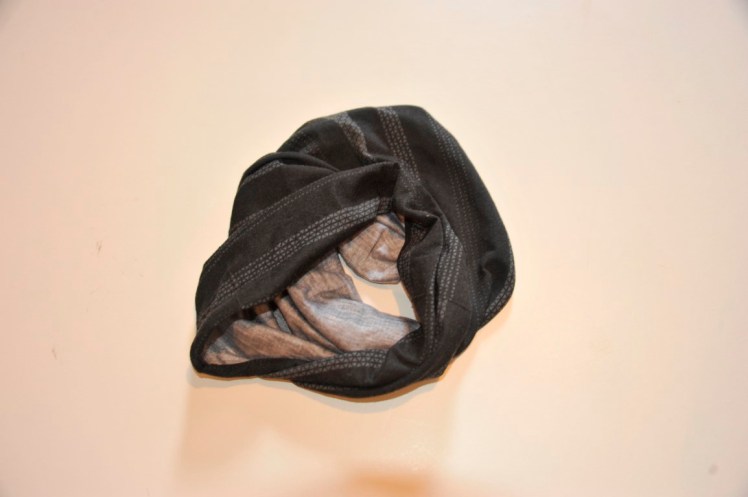
With all these hoods, you don’t need a scarf! My mistake originally was to buy one. The one handy thing to have though is a buff. If it was to do again, I would have taken two with me because it is such a small piece of fabric that you loose it easily. I lost it in the Galapagos, probably forgot it on the dive boat, and then didn’t run into one again until La Paz. A buff or head wear is great because it protects the neck from the wind, and the nose in particular from the wind and the cold. It is thin enough that it can be put under all the layers and hoods. It can also be used to protect the ears from the wind on a dive boat. This one is the one my cousin Dalisay offered to me for my birthday this year which was an awesome gift as I had lost my last one again! Let’s hope I don’t loose that one!
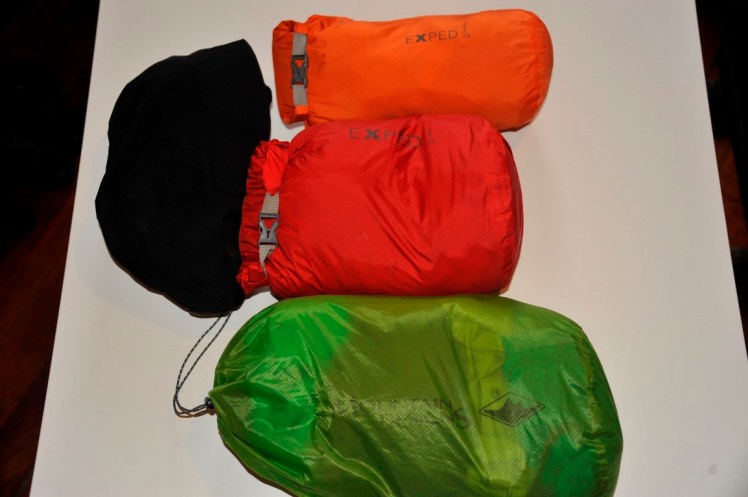
One thing I learned at K2 Basecamp hiking store was to roll the clothes rather than fold them as a packing technique. It means each item is separated which makes it easier to structure the bag and to grab one only but also somehow it saves space. So here were all the top layer items and the bag for the underwear and bras and socks.
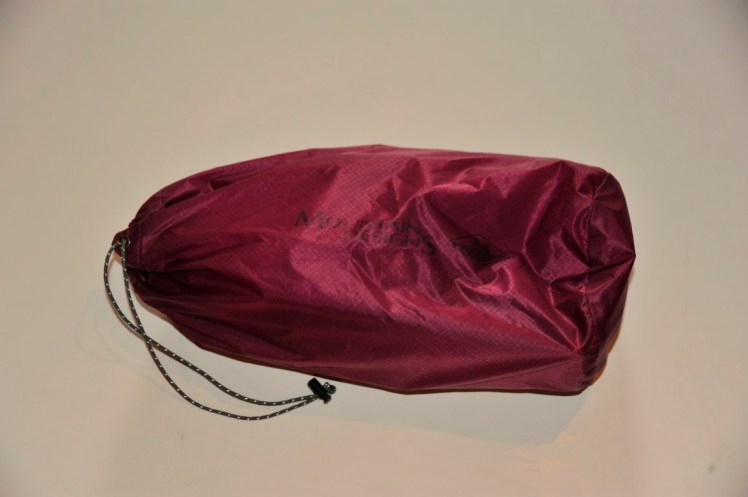
For the top layer items, I used another Exped bag, a big one this time, red and an additional green Mountain Designs bag.
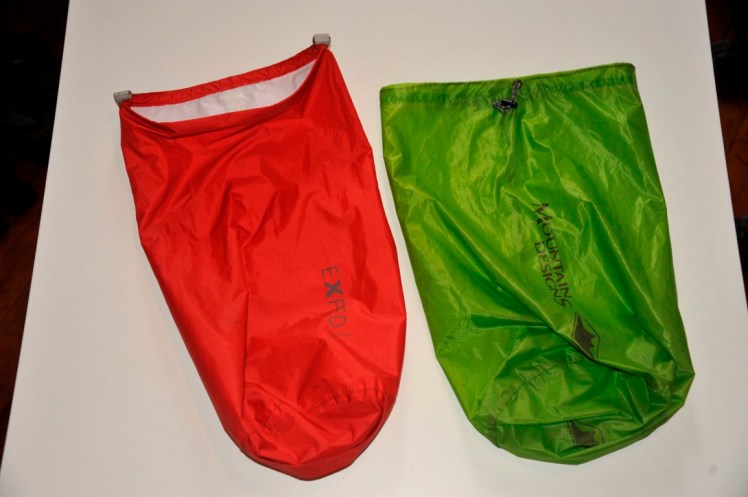
And here we were.The good thing with compartmentalising your clothes into bags is that you protect them from the dirt and from getting wet if your backpack ever gets wet, but also you start creating a system which means you are going to find very easily what you are looking for each time to search for it. And that’s priceless! I was keeping the rain jacket separate, usually within easy reach in case it would rain.
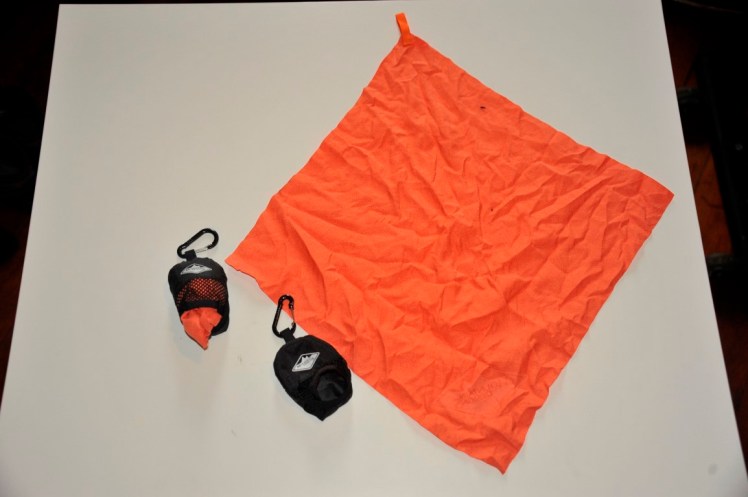
Then towels. My main towel was one long 40cm x 120 cm micro-fibre towel that I can’t find anymore. This is the one you can see on this photo drying on the door in Sao Paulo. If it was to do again, I think I would also carry a small normal towel because after months, it becomes the one thing that you start getting tired of. I would probably have swaped my gaiters for a normal towel. In dorms hostels, it is possible to rent a towel for the time you are there, but that can turn expensive after renting too many and carrying a nice towel is probably a nicer luxury item than gaiters and more handy.
I also carried two tiny micro-fibre towels, 30cm on 30cm. They proved handy in several occasions, when drying the feet on the Ciudad Perdida trek after passing rivers before to put the shoes back on. When drying the dishes when camping. When taking my contact lenses off and putting them on in the morning in the tent as there is always a bit of product getting out of the contact lens box. When changing my mooncup in the wild when bushcamping with in one hand the Nalgene 500ML water bottle to rinse it and the towel in the pocket to dry hands after. Very handy those little microfibre towels and they don’t take much space in the bag!
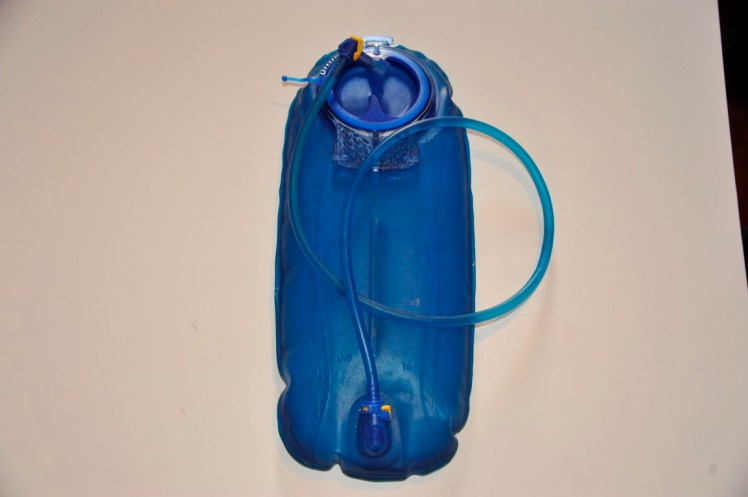
For water, I had an awesome camelback of 3 litres which was really handy when hiking in places with less water but also when arriving at a campground where the river was a bit far away. I could get 3 litres in it for the evening cooking. Camelbacks are awesome as you can sip a few drops of water now and then without stopping. It ensure that you don’t get dehydrated but the downside is that you can’t see easily how much water you have left so it’s good to also carry a 500ML bottle beside a camelback. They are not easy to use to pour water to brush teeth at a campground either for example.
 I also had a 500ML Nalgene bottle similar to this one but grey that I stupidly forgot while bouldering with my friend Daniela in Amsterdam. They have wide mouth and narrow mouth models. I prefer the narrow mouth models like this one but that’s a personal preference really.

Other little things, polarised sunglasses for the snow. I actually lost mine in Pucon and then bought those great Salomons ones for 5 dollars in a charity shop the next day that are polarised and that I am still using now. I had another 50+ sunscreen, any small one like this size or smaller is just great to carry and can last about 2 months.

Headtorch is important too, not only for hiking but when arriving late in a dorm where people are sleeping, or for the eventual moment where there is a power failure. It is really essential for hiking though and it is good to have some spare batteries for it.

Now the electronics. I bought the netbook in Bogota with the charger and the x-drive. A netbook is essential if you are blogging. If you are not, you may not need a computer although for photo backups, it is risky to trust the computers of internet cafes as they can have viruses. I got 2 weeks of photos in Colombia blocked by a virus in San Gil and I still have to see if I can recover them somehow. So unless you have a good wireless way of backing up photos, a computer or tablet to do that may be good.
A couple of USB sticks always prove to be handy. For the adaptor I just bought them on the way in the streets whenever I needed them. I like to carry a recorder but the phone can also do that now. Same for the GPS. Although a GPS can lost 30 days when a phone can last a day so having a real GPS ensures that you don’t run out of battery. Saying that, I would have really needed it in Girraween National Park in my test run, but in South America not that much ultimately. Little notebooks are great to write down people’s contact details, expenses, or random stuff or even small diaries. I love the Moleskine series because they are very small and sturdy. My Kindle was essential, having all the travel books but also novels and being so light. I still picked up a few real physical books on the way though. The little Priceless thing is a London Oyster-card holder that I use as a wallet for my main credit card and some cash. That ensures that I never carry too much stuff in there.

For camera gears, I love photography so I got the Fujifilm XT-1 as an alternative to taking my Nikon D700 because the Nikon is very heavy and bulky. I wanted a lighter setup so that I could enjoy shooting in high altitude. It proved to be a really great camera. It is slower than a DSLR and not as sharp I think, but still does a great job. I took originally 7 batteries with me as friends had told me it used a lot but realised 4 was enough and shipped back the 3 extras. A battery charger is also needed for them. I also carried a gorillapod, the JOBY head one with the little thingy to put under the camera before to put it on the gorillapod and the timer which was handy to take 15 minutes night shots like on the hike in Huaraz. I took with me an ND8 and an ND400 filters. I actually didn’t use the ND8 but the ND400 was great to take photos of waterfalls for 4-5 seconds in the bright light. It is a black filter. If you don’t have it on, you can put an F22 aperture on your camera and the lowest ISO and your highest speed will only be 1/2 second or a second to take a waterfall in a bright light. But with that filter on, you can reduce your exposure to 4 to 15 seconds which changes the way the waterfall looks, making it really smooth. I had 8 cards and a card holder for them I was keeping in an old Etihad flight bag. A card holder helps to organise you cards. As I shoot RAW, having only one or two cards would not be enough. Having more cards also ensures that you have card backup, computer backup and x-drive backup for the longest possible. Saving on the cloud is a nice idea but you don’t always get a connection good enough to do it that often. The little usb device is something I picked up in Bogota to put in the micro SD cards, Sandisk cards or other cards formats to transfer easily to the computer. I actually also travelled with 16 micro SD cards of 16 GB each which were mirroring the 16 GB cards I had. Why so small? Because if you screw up or loose a card, you loose less photos than if you card is 32 or 64 GB. So when I got 2 cards corrupted in San Gil, I only got 2 weeks of photos blocked. It could have been worst. Every now and then, I would do backups on the micro SD cards and ship them to my cousin in Australia. It gave me the peace of mind that someone could still all my stuff and I would not have lost the photos. Doing regular backups is very important as the one thing you don’t want to loose is your photos. The rest is replaceable. I also had the little pear that Matt from the hike in Huaraz gave me before he went back to NY which proved to be very handy to get the dust out of the lens but also inside the camera body. And finally I carried Smurfette / Juanitette in the small pocket left of my camera bag so I could have it handy anytime.
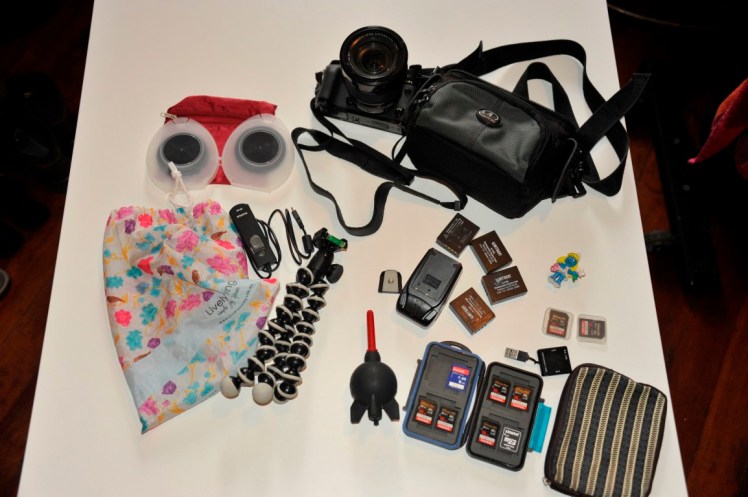
That’s how it looked when everything was back in order.
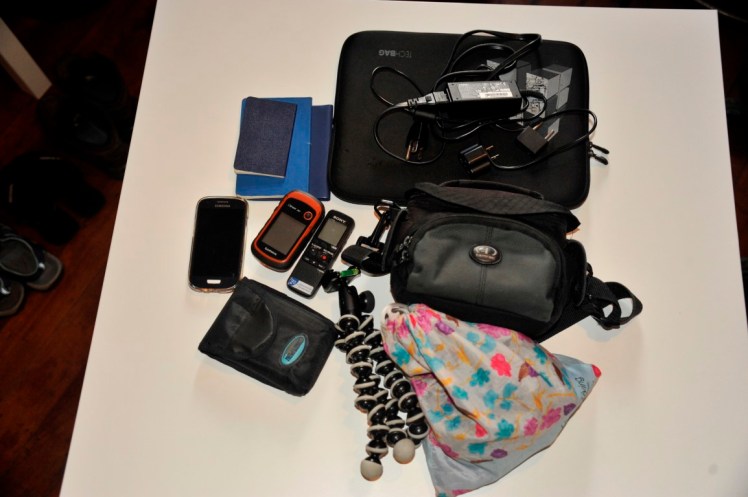
I carried all this in the small backpack, and my camera bag around my shoulder in diagonal so that I could get the camera out of the bag and shoot anytime I wanted. One thing I really regretted not taking with me was the GoPro that I do have. It would have been really great to have it when diving and snorkeling in the Galapagos but also when rafting and paragliding. I had not taken it thinking that I would get all my stuff stolen so that was not worth getting that stolen too, but that would have been really great to have it.
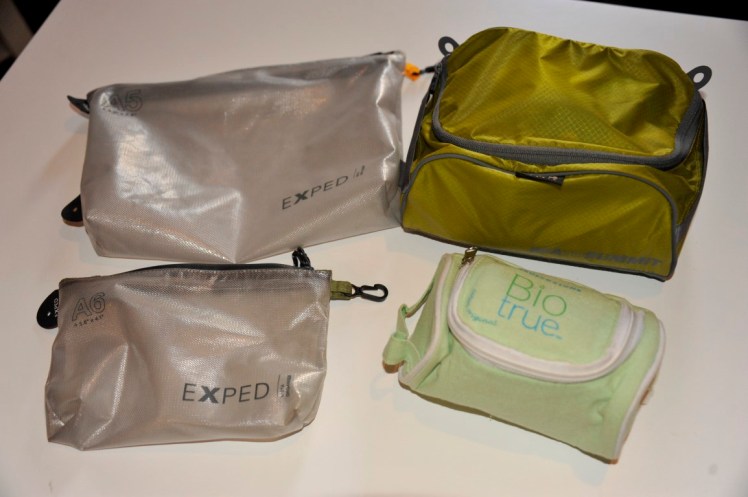
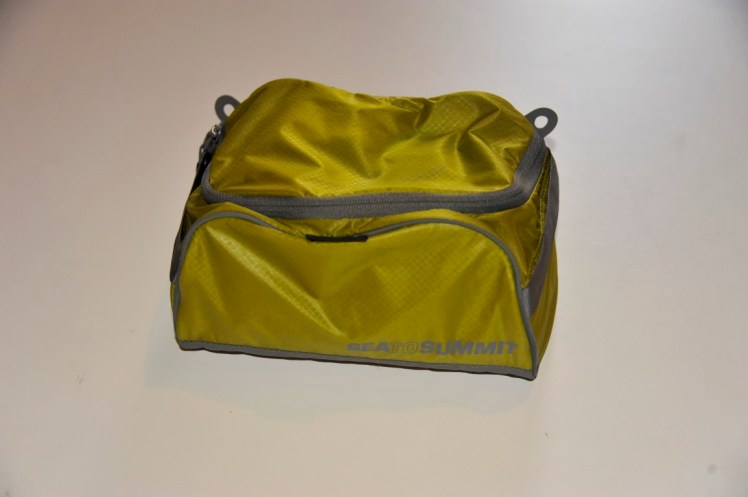
Now for the toilets stuff. I bought these Exped bags. I liked that they were transparents and also water-proof. I got the Sea to Summit waterproof bag I used for the first aid kit (the flashy green bag you can see on the photo). I also had this light green bag with 8 months of lens boxes in there (enough in case I was loosing some contact lenses on the way, that always happens) plus some Aquarest brand drops to put in the eyes when my eyes would go dry.
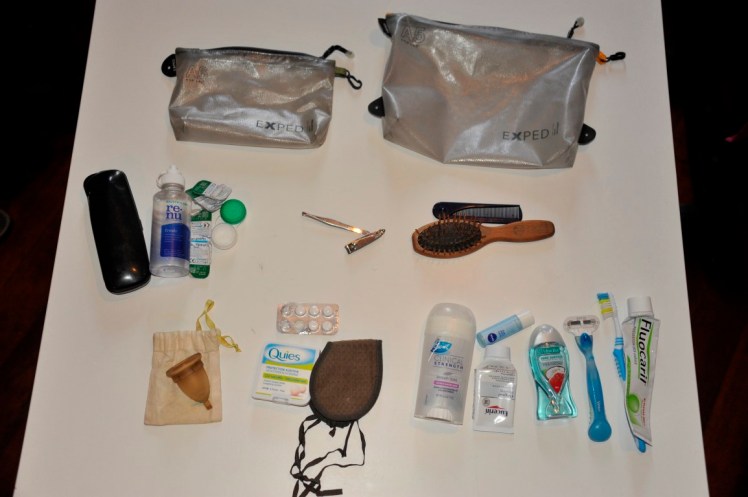
And here is what I had. I am pretty minimalist when it comes to toiletry. A toothbrush and a rest of toothpaste. I accumulated “almost empty” toothpastes a few months before to leave so that I would not have to carry a full one. You don’t really need a big chunk of toothpaste on your toothbrush but just a little bit of it so that it lasts longer. That’s a tip that the guy of K2 Basecamp gave me and that I have been applying since. I had taken with me an electronic epilator but it proved to be too noisy and too much time consuming so I shipped it back after 6 weeks and only kept the Venus razor. Some small container for shampoo that can be used as a shower gel too and refilled. Whatever you use, soap or what, the most important is that it is small. Then a lipstick for dried lips and a small tube of hydrating cream. Eucerin is a nice brand because just a bit of the cream can be enough for your skin. One deodorant. And then really essential for all these nights in shared dorms, the eye-cover from planes and the earplugs. Some paracetamol. A Mooncup for girls. Now, girls, if you don’t know about mooncups..It’s time. Jump on google and get one. That will change your life. A hairbrush and small comb. Some tweezers and nail cuter. A pair of glasses. A box for contact lenses. Spare contact lenses in the small box in case I lost one on the moment of putting them or taking them off. The smallest contact lens product I could find. Here it is 120ML but sometimes I could find 60ML.
Here we go.
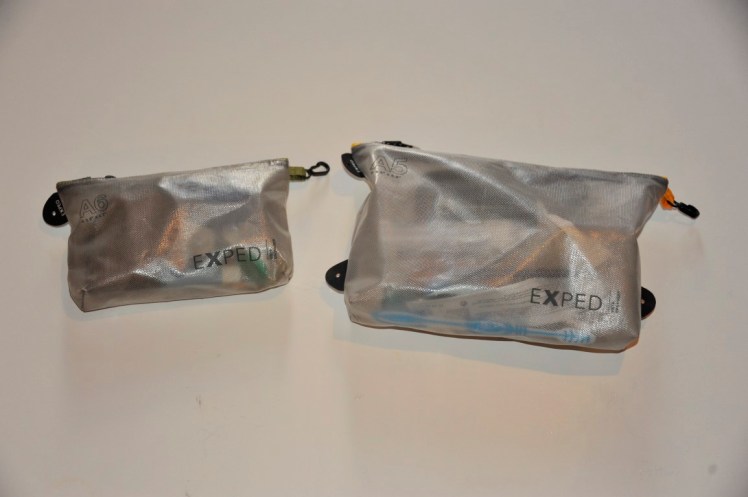
I put these 2 bags and the contact lens bag inside this purple bag. That was my colour code to find the toiletries stuff easily.
So what did I have in the first aid kit bag?
Not everything is on this photo as since I have either used, given away or left in Europe some of its content. Alcolhol stabs, betadine and compress and tape for compress and small pair of cissors. That is usually the most handy stuff for wounds. Amazing how neatly wounds and cuts will heal when you apply some betadine and protect this for a few days! Had some purification tablets. Some spare pen and tape. Tape always proves to be handy. Some thermometer I didn’t have to use. Strepsils for the throat, aspirin and paracetamol. Hydration tablets, SMECTA to consolidate your poo and try to make it solid when you have diarrhea, along with immodium and tiorfan and ercefluril for diarrhea. Diarrhea fights stuff are always really handy for any trip as the chance of getting diarrhea at least once is always big. The little blue plastic “forks” are tick-removers that are sold in France and really handy. They are better than tweezers because you remove the tweak but grabbing the head and twisting with the fork which ensures the head gets out. If the tick head doesn’t get out then there is a risk of getting the lyme disease. I saw Emmanuelle from T’as quoi sous ton poncho using them at the end of our Ciudad Perdidad trek when someone had a tick in their hand. Otherwise, some bandage to use for a wrist or ankle injury. I also had a strained knee band that you put on your knee but never had to use it and gave it a month ago at Easter at a campground where a guy had bruises on his hips so he could use it as padding as he was on his first day of 6-week hike. Aloe vera is good when your skin gets burnt or Biafine, the French legendary burn-fighter tube that all French love. The yellow tube in the right handside corner is against bites and very handy against sandflies. Left next to the green bag is some tiger balm, so good against muscular pains and some patches for the back which release tiger balm when put on that you can keep for a few days. Then some spare hairband and spare venus razor blade. And top left some things for stitches but didn’t use any. That was it roughly. I also had a box of malaria tablets I used when I was a week in the jungle in Iquitos and I had a malaria detection kit that would get handy if I got a 41 degree fever to identify if that was due to malaria or not. Some small pack of tissues. I picked up a whistle also at some point. Now, anyone’s first aid kit is different. Some would also have anti-hallergic products but I don’t get allergies so didn’t need that. Others have specific medication to take. It really varies from one person to another. Insect repellent also is good to have. I bought some on the day before to head to the jungle in Iquitos and it was very efficient and handy.
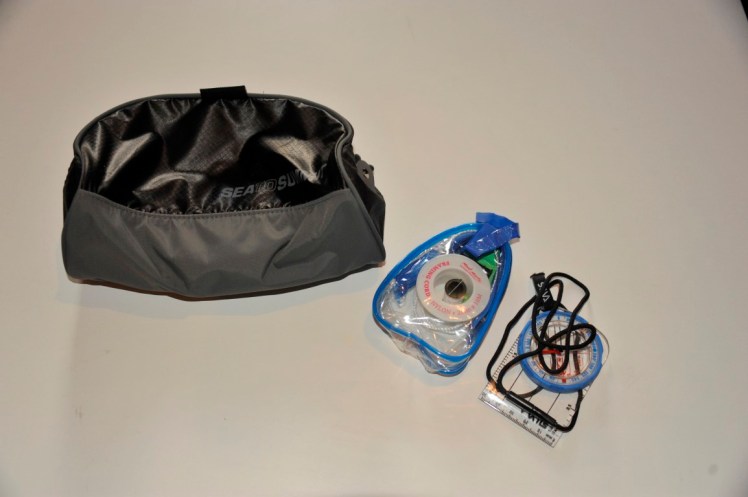
 I also had this small bag which served for everything and nothing. A few spare American dollars. A small kit with needles and thread that was handy to sew sometimes. A compass but I didn’t use it ultimately so not that necessary.
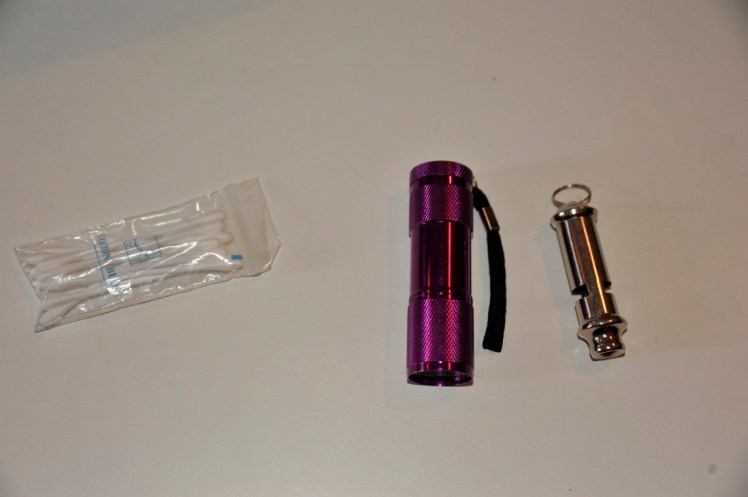
Forgot to mention. A whistle. A spare torch. Some cotton buds.
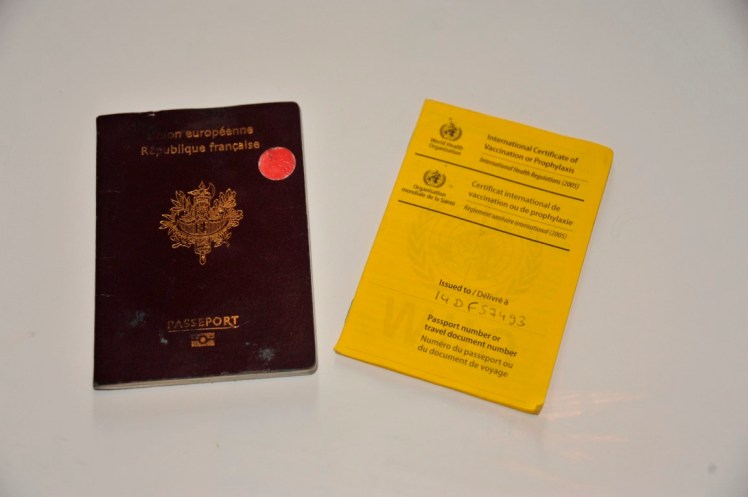
Passport and yellow fever vaccination notebook. I usually carried my passport under my camera in my camera bag to have it handy constantly.
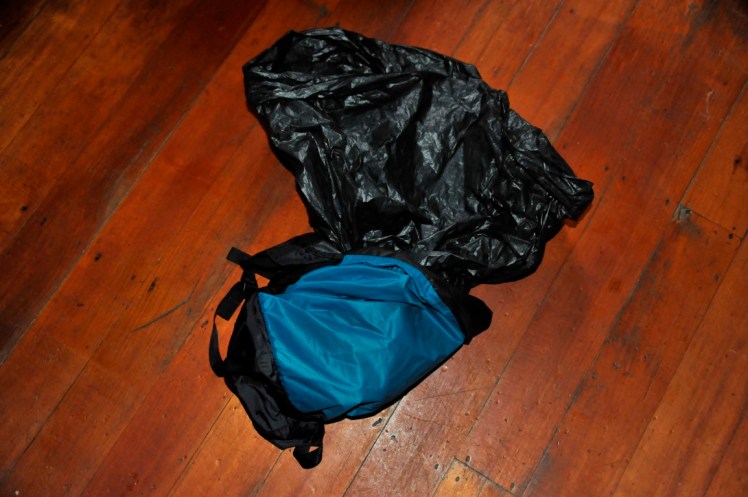
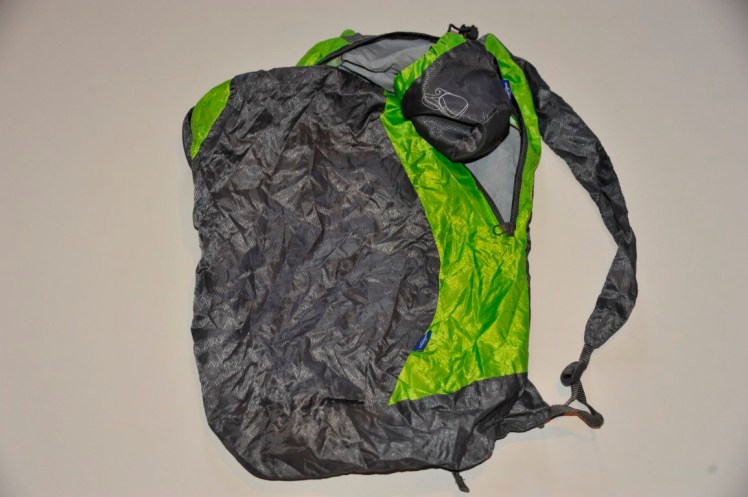
The one thing I had bought before to go travelling and didn’t take with me was this: a very small light 50g backpack.
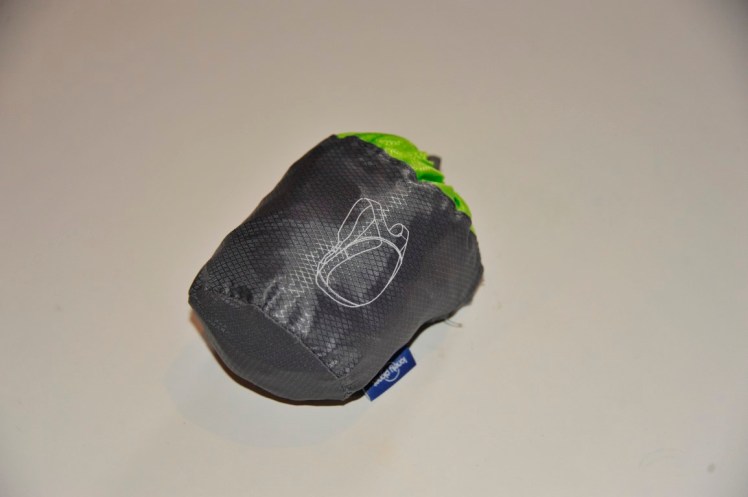
It opens like this and would have proved handy so many times for little day hikes to carry just some water, suncream, snack and sunglasses and hat or a little fleece or the raincoat.
I bought one in Puerto Natales just before the Torres del Paine but it was 4 times bigger and heavier than this. This was an item hard to find in South America that I really regretted not taking with me.
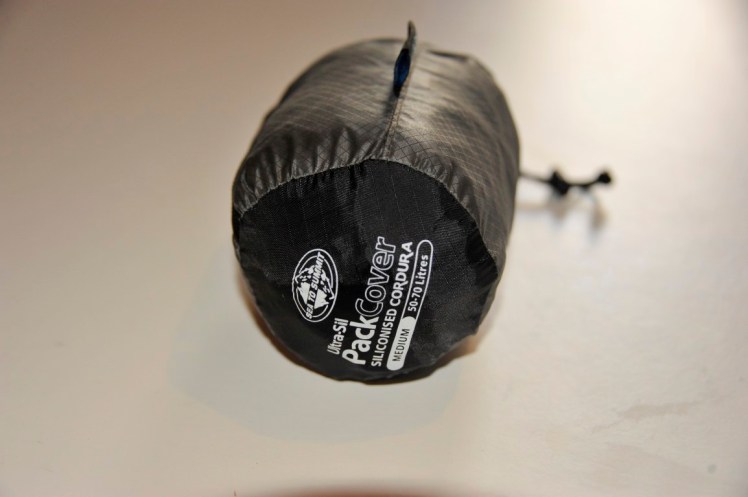
The other thing I regretted not taking with me was a raincover for the big backpack. The guy at K2 Basecamp had told me: “Don’t worry, it is canvas.” but in reality, after a few hours under the rain, canvas also gets soaked. A oack cover like this one which can be tied would have been good. If you get a backpack which already has a pack cover within the backpack that is even better.
And this is roughly. I may have forgotten a few things but that’s about the essentials. Hope that gives some ideas, and if you have some ideas for me of things I was missing that you think could have been useful, please email me, always interested in feedback about the backpack!
